How to Build your First Chatbot?
Chatbots or Virtual Assistants are boon for businesses as it automates the business processes and offers 24×7 support. Building a bot for your business helps to streamline interactions between customers and services, enhancing the customer experience. By using REVE Chat live chat platform, you can automate and scale your customer communication to deliver a conversational experience.
The best way to decide on the platform for your business is to chatbot use cases and depending on your business requirements. You can choose one of the two ways to build chatbots i.e. ready to use chatbot platform and custom development.
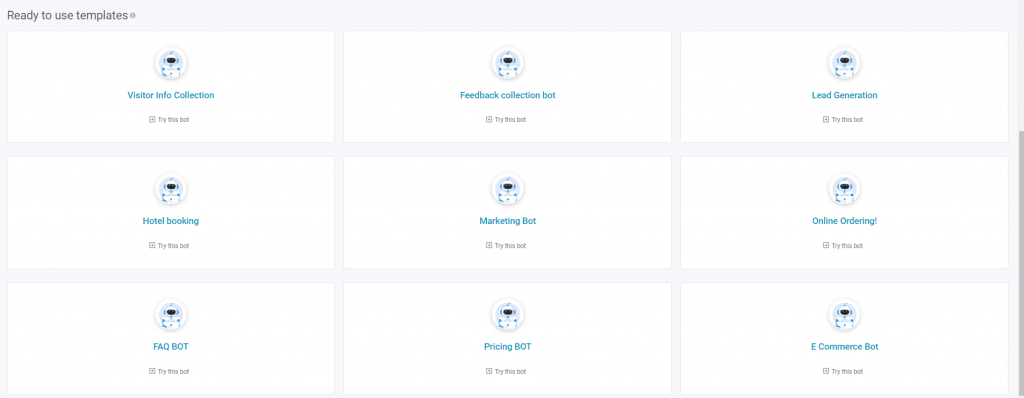
REVE Chat offers ready to use templates for building chatbots.
Businesses that have specific requirements or complex use cases, it is recommended to build a customized bot. You can design your nodes and bot flow that will match your business requirements. There are four main steps for building a bot across your business use case.
Step 1: Customize your bot profile
Customizing adds a humanized touch to your bot and makes user interaction comfortable and friendly.
Login to your REVE Chat dashboard and click on the “Bot Builder ”. On clicking it, you get the option to “Create New Bot”.
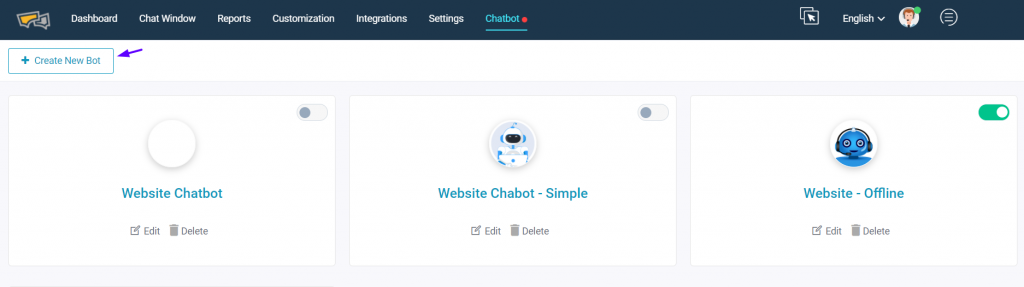
When you click on ‘Create a new bot’, you get a variety of options to customize your bot profile.
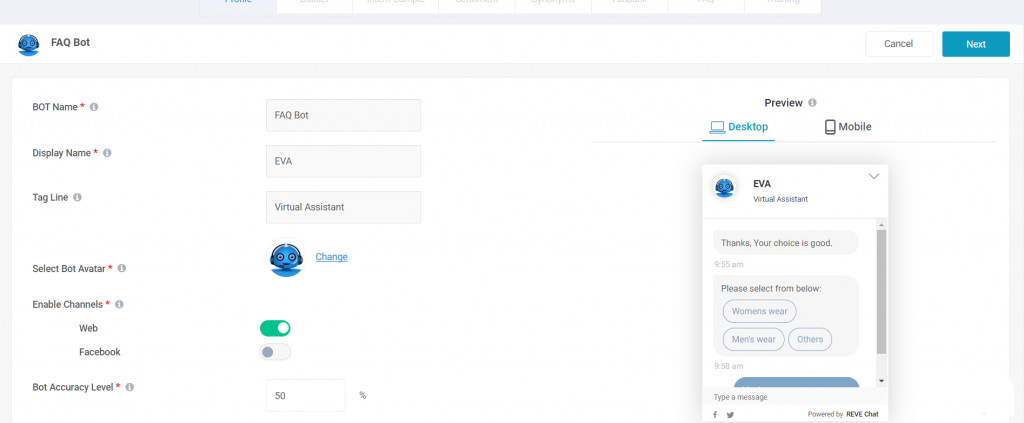
Here’s what you can do to customize your bot profile.
- BOT name – You can name your bot for internal business purposes. Your customers won’t be able to see this name. For e.g. Sales or Customer Service bot.
- Display name – You can give a name to your bot that matches your personality. For example, Eva or Zoe. This name is displayed to your customers and makes them feel that they are interacting with the human agents.
- Tagline – You can set a designation of the chatbot, which is also be displayed to visitors and customers.
- BOT Avatar – You can personalize your bot by choosing an avatar from the gallery or upload of your choice.
- Enable channels – REVE Chat offers two channels for bot communication. (i) Website (ii) Facebook. You can choose your preferred channel to deploy the chatbot for 24×7 assistance.
- Bot Accuracy levels – Here you need to select the query matching the accuracy level in percentage.
- Set priority of bot and human agent – You can choose from the three options to set the priority of bot and human agent for seamless communication.
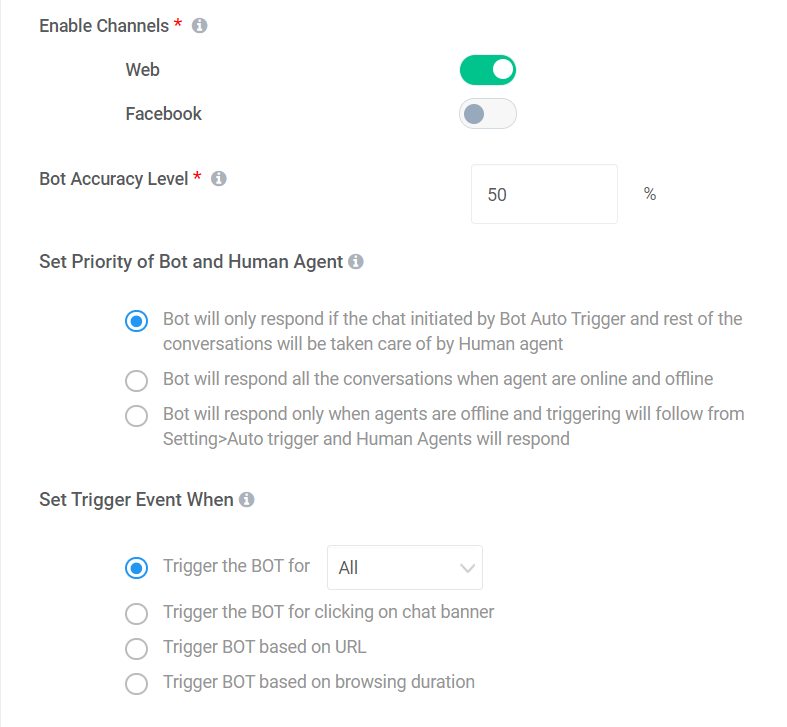
REVE Chat offers four main triggers with sub-options. Based on the trigger you select, the chatbot will initiate conversations.
Trigger the bot for – (i) All (ii) New Visitors (iii) Returning Visitors
- When you choose (i) All, the bot fire triggers to all your website visitors & customers without any specific conditions like new visitors, repeat visitors, browsing duration of the visitor, etc.
- When you select (ii) New Visitors, the bot will fire triggers only to the new visitors to your website by sending customized greeting messages like: “How may I help you?”
- On choosing the (iii) Returning Visitors, the bot will fire triggers to the same or repeat customer by saying “Good to see you! How may I help you today?”
Trigger the BOT for clicking on the chat banner – The bot will fire triggers, only when the visitor clicks on the chat widget.
Trigger BOT based on URL – The bot will fire triggers when any visitor moves on to a specific page on your website then the trigger will be fired if you choose this one. For e.g. Features or the Product page.
Trigger BOT based on browsing duration – When the visitor stays on your website for a specific time then the trigger will be fired on choosing this trigger event. Suppose your visitor stays more than 3 seconds on the pricing page, the bot will trigger “ Get 10% discount off on today’s sign up”.
Step 2: Build your bot flow
It is the most important part while building your chatbot. You define your bot flow with nodes and actions. Before we go in detail about building the bot flow, let us understand the terminologies.
Node – It is a specific scenario or a part that you want to execute the overall bot flow. It could be anything – a welcome greeting or a product overview. These messages are set according to the bot flow.
Actions – Actions are defined as interactions that chatbots can make with visitors. With actions, you can add different elements as described below to drive your conversations forward in a pre-defined manner.
Learn more chatbot overview and understand the different bot actions offered by REVE Chat.
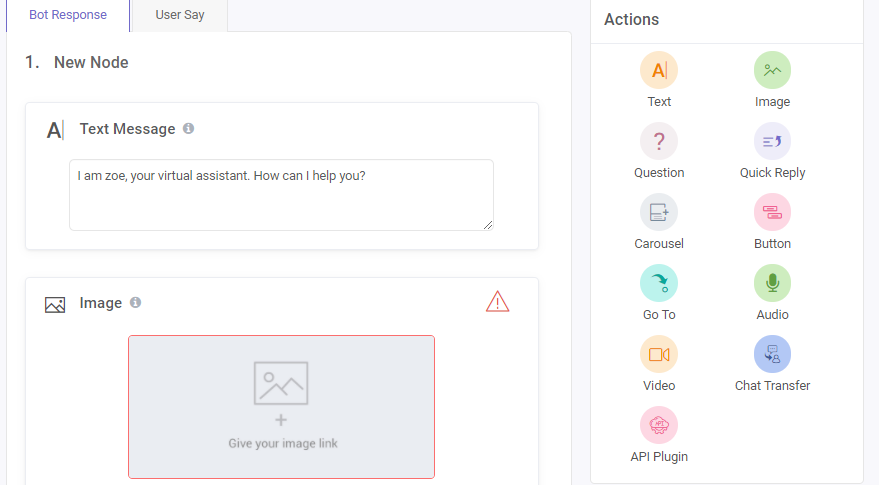
You have to add new nodes with the help of different actions to build the bot flow. For example, add the required actions such as the Text Message, image, carousel, video chat option depending upon your business requirements.
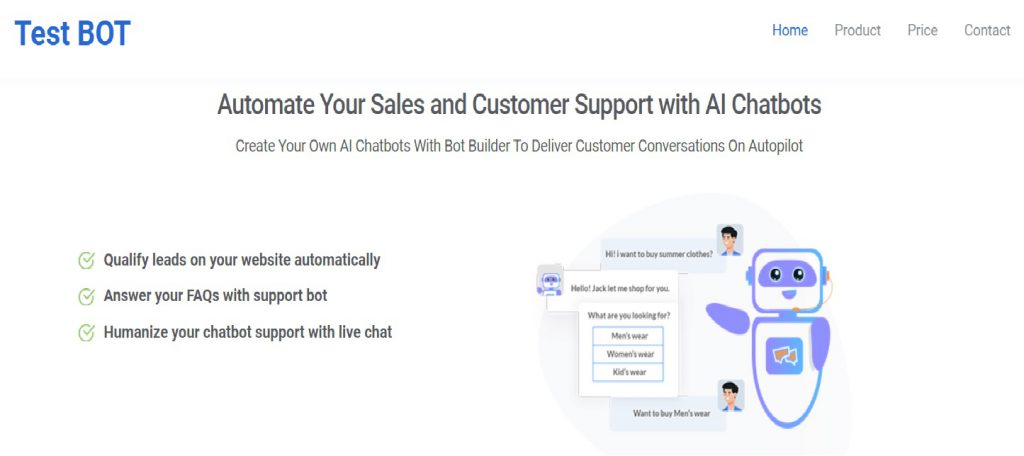
Before making it live you can test the node by clicking the “Test it out” button. Once your bot flow is functioning properly you can save it.

Once you click this button a test website opens & the chat banner opens with a trigger message.
Pro tip: If you want to use a particular trigger, select and add it as a part of your bot flow.
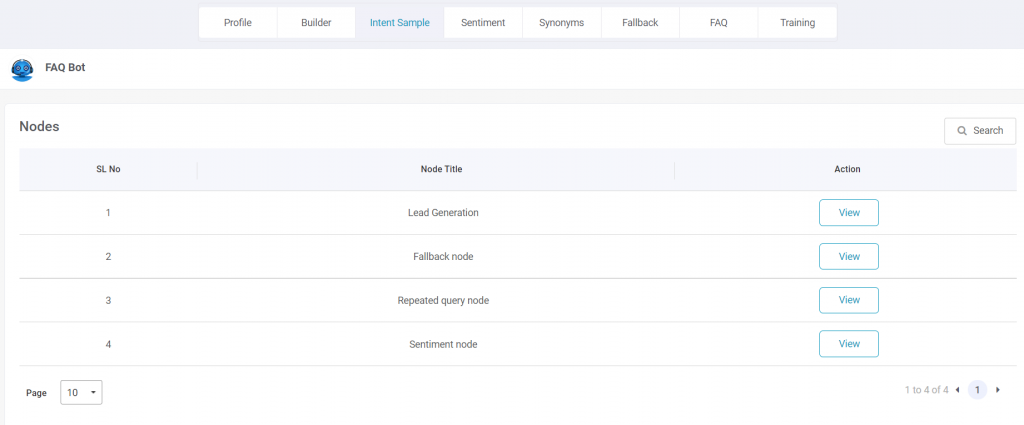
Step 3: Intent Sample
Intent refers to the user’s intention — it is the chatbot jargon for the motive of a given chatbot user. It is the intention behind each message that the chatbot receives. Here you can create new nodes of creating intent samples.
- You have to enter sample queries having the same meaning that covers customer intention while interacting with the bot.
- When you enter the sample queries, a list is created that is used by the bot to handle customer service conversations.
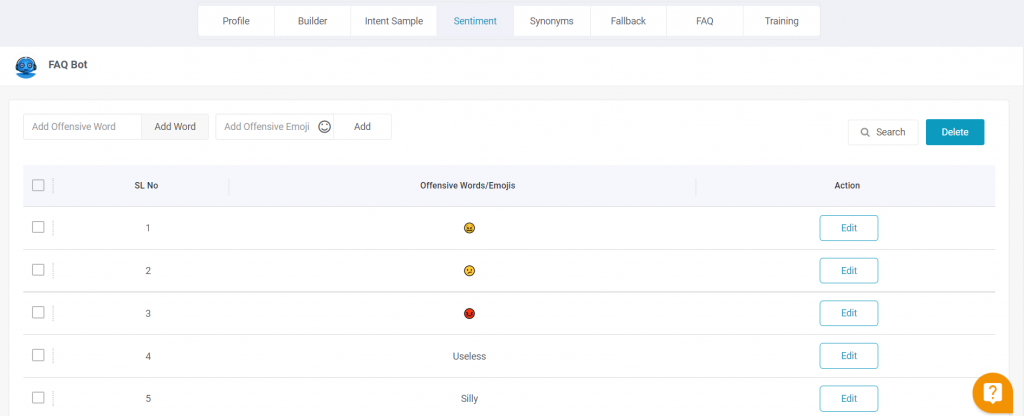
Step 4: Sentiment Analysis
Sentiment analysis helps in developing the bot’s emotional intelligence. It allows users to configure offensive/negative words & emojis. If the bot finds offensive/negative words or emoji in a visitor’s message, it will show a response as per Sentiment Survey Flow design under Fallback which may include transfer to human agent option configured by the user.
Here you can ‘Add the offensive words and emojis’ for your bot to identify user’s sentiments during the conversation.
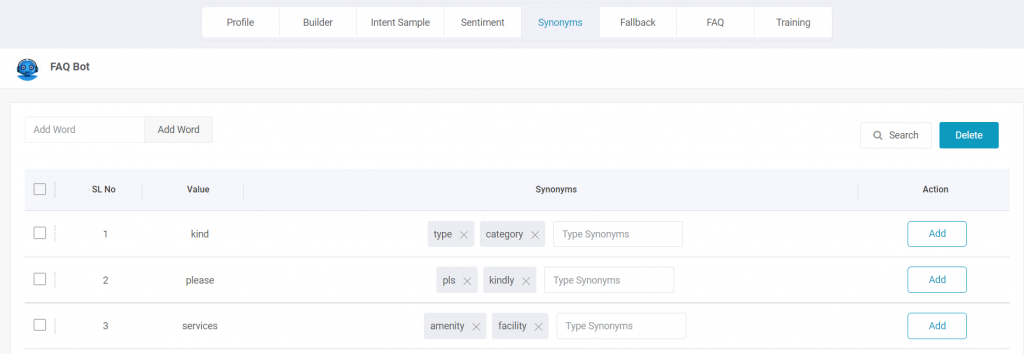
Step 5: Synonyms
It allows you to configure synonyms from Bot Builder. If the customer uses jargon in his query, the system will understand all the synonyms of it and can use it to match with the corresponding knowledge base.
Step 6: Fallback
Fallback interaction is a default interaction that pops up when the bot doesn’t recognize the user’s input.
Defining the fallback scenarios is an important part of designing chatbots. When users interact with your bot with a random request they expect a response. If your bot is not capable of fulfilling the user requests, it is not an ideal fit for those scenarios.
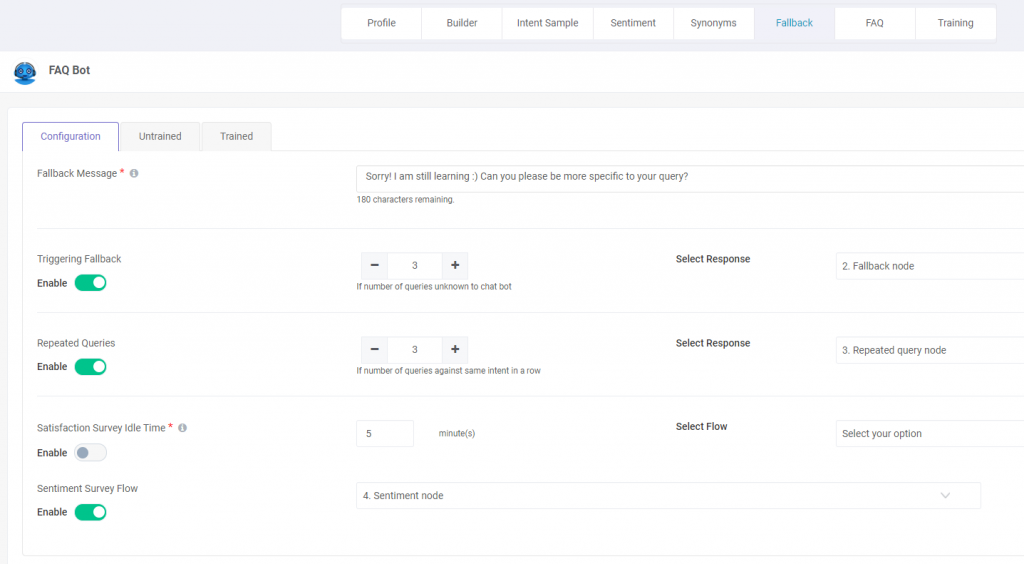
- Fallback message – You can set customize a fallback message when the bot is unable to understand the user requests.
- Triggering fallback – Here you can define the number of queries unknown to the bot for triggering the fallback option.
- Repeated Queries – It defines how the number of times the query will be repeated. You can choose your preferred number.
- Fallback options – When the bot is unable to figure out the user intent, the system will prompt a fallback message or connect with a human agent according to the selected options.
Step 7: Create FAQs
Creating FAQs helps your bot to learn about your business. It trains the bot to identify the user intent and have effective communication with the users. Here is how you can create FAQS to enhance the user experience.
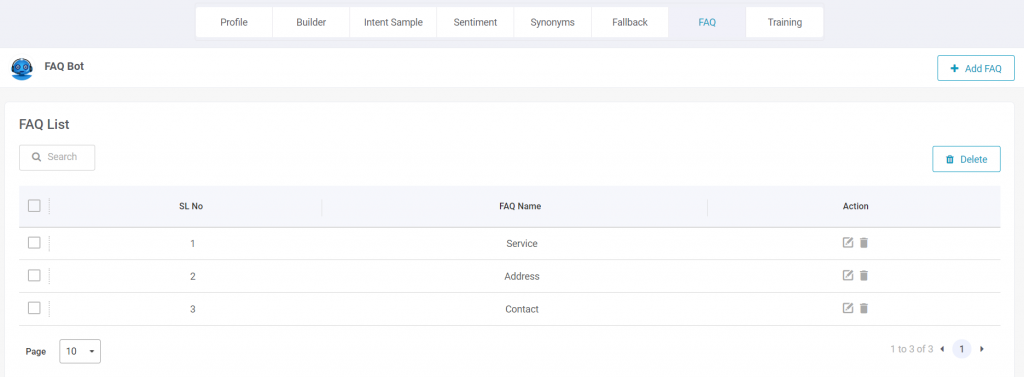
- Enter your query – You can add your query along with multiple variants of the customer’s intention for a better understanding of the bot.
- FAQ Response – Enter response of the intention. The response can be a simple text or forward to a specific node from the bot builder.
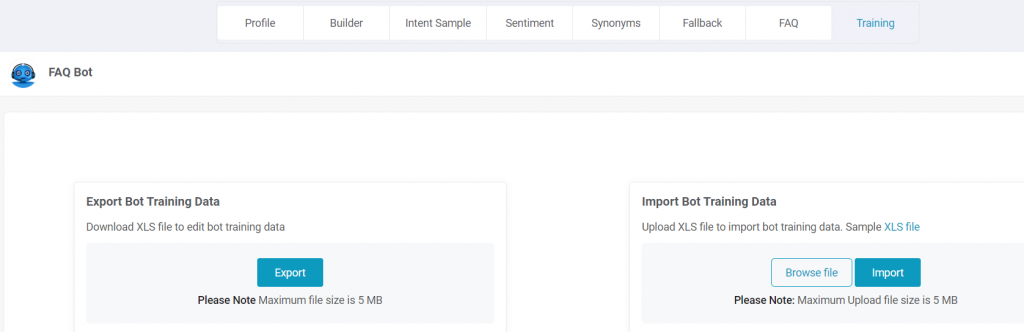
Step 8: Chatbot Training
Chatbot training allows users to export bot training data in bulk in excel format. The users can edit the training data in the excel file and import it back in order to update existing bot training data.
Voila! Your first bot is created successfully. You are ready to access your bot on your workflow.